A faulty ball joint is a common issue, and it may occur after years of driving your car on uneven and bumpy surfaces. When they get worn out, ball joints can have a huge effect on your suspension and driving.
The majority of car models have both upper and lower ball joints. The lower ball joints of a car tend to be larger, and they wear out much faster due to the weight of the front part of the car that rests on them.
To remove a stuck ball joint, you’ll need to follow the following steps: raise your car and take the wheel off, place a hefty file or something similar in between the A-clamp and ball joint clamp, lower the suspension really fast, and then use a pry bar or chisel to remove the stuck ball joint.
Table of Contents
Purpose and Importance of Ball Joints

The purpose of the ball joints is to enable the suspension and wheels to move in all directions. They also allow your car to move over uneven surfaces.
Ball joints have a vital role in the suspension system of your car. That’s why it’s crucial that you’re able to notice that there’s something wrong with one of them, as well as learn how to inspect and remove a faulty ball joint.
The Symptoms of a Failing Ball Joint
If you notice an issue with a ball joint, I highly recommend replacing the damaged ball joint, along with its pair. Once one ball joint becomes faulty, its pair on the other side will fail soon too.
Here are the most common signs that one of the ball joints on your car is failing:
- Car drifting to the side
- Uneven tire wear
- Shaky or loose steering
- Squeaky or clunky noises
- Excessive vibration in the front part of the car
How to Remove a Stuck Ball Joint – Step-by-step Guide
1. Raise the Car and Take the Wheel Off
The first thing you need to do is to raise your car and take the wheel off. You need to make sure the rotor is secured to the hub. You can also put a castle nut on to protect the threads.
Now jack up the part of your car where the faulty ball joint is located via the subframe, and then put an axle stand on the jacking points on either side. Once you’ve raised it, take the wheel off.
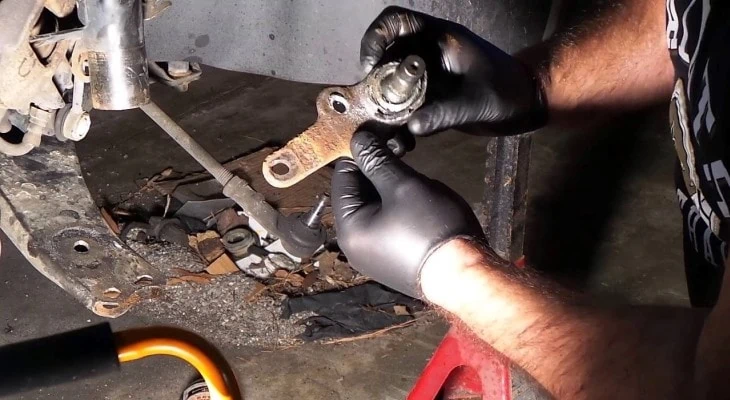
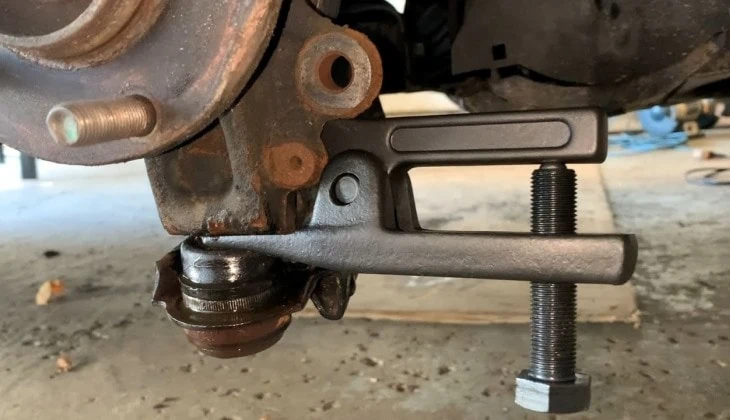
2. Put Something Hefty between the Ball Joint Clamp and A-clamp
Now you need to put something sturdy in between the ball joint clamp and A-clamp. I suggest a file that barely fits in there and is very hefty and thick. Just make sure it’s going to remain in its place and not get loose.
3. Lower the Suspension Very Fast
After that, put on your safety goggles and lower the suspension really fast.
If you hear a nice crack while doing it, it means it worked. But don’t pull the joint yet if you have the rotor jacked up as it will fling out dangerously.
However, if that didn’t do the trick, it means the ball joint is badly stuck, so proceed to the next step.
4. Try to Remove a Stuck Ball Joint with a Pry Bar or Chisel

Now you need to find something even sturdier, like a big scutch hammer or pickaxe, and do the exact same thing again. Then grab a pry bar or chisel, and try to remove the stuck ball joint. Don’t hammer on a file or use a hammer as a prying implement.
Final Thoughts
If you notice an issue with one of the ball joints on your car, continuing to drive it can cause a lot of damage to some of the other car components. If the ball joint fails completely, you could easily lose control of the car, which can lead to a crash and injuries.
There are multiple ways to remove a stuck ball joint, but the one I described in this article is the most efficient one.